
Model railroading is an art of crafting realistic miniature worlds, where every detail counts. One key element in achieving this realism is the use of HO-scale weathered gray split shakes/2, which significantly enhances the authenticity of your model train layout. These small roofing elements may seem minor, but they add a profound layer of depth and realism. By incorporating these meticulously crafted pieces, you can replicate the rustic, aged look of real-world structures, elevating the overall appearance of your model buildings. In this guide, we will explore the advantages, application tips, and best practices for using HO-scale weathered gray split shakes, ensuring that your model layout achieves a remarkably convincing look.
Understanding HO-Scale Weathered Gray Split Shakes
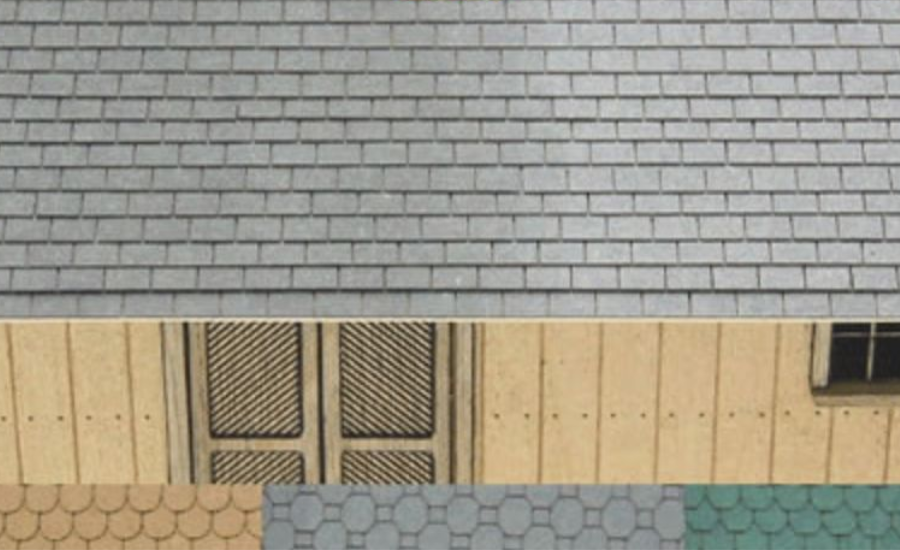
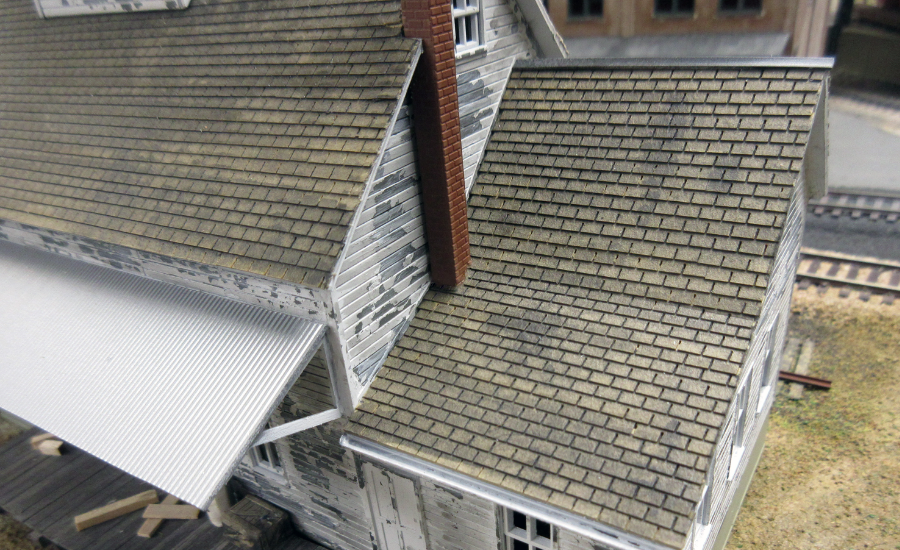
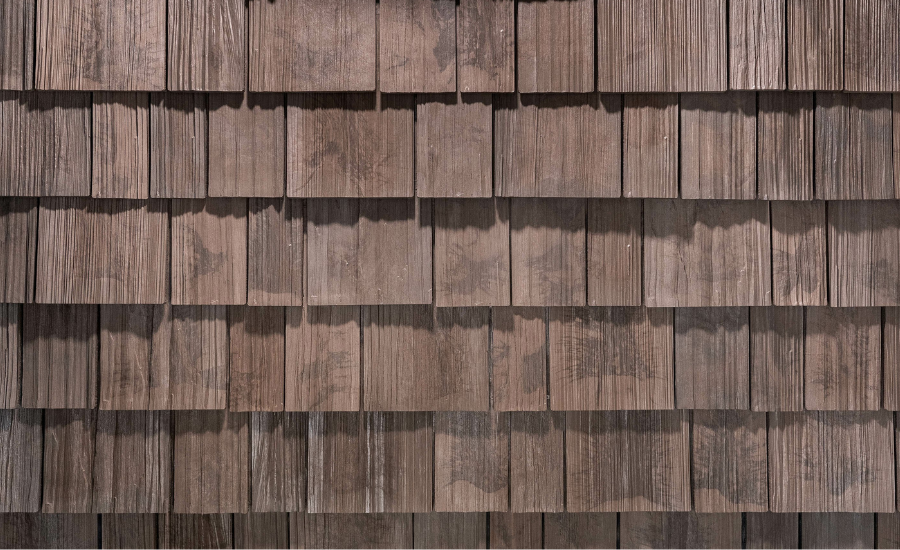
HO-scale weathered gray split shakes are meticulously crafted miniature roofing shingles designed to replicate the appearance of aged wood shingles found on vintage buildings. The distinctive weathered gray color gives the impression of wood that has endured years of exposure to the elements, adding a rich, time-worn character to your model structures. This effect not only enhances the visual appeal but also brings an extra layer of realism and depth to your model buildings, making them stand out with an authentic aged look.
The Appeal of Weathered Gray Split Shakes
Choosing weathered gray split shakes for your model railroad layout offers several compelling benefits. The weathered gray hue is particularly effective in suggesting a long history and a structure that has withstood the test of time. This color choice adds a subtle but powerful element of authenticity to your model buildings, making them appear as though they have been part of the landscape for decades. The natural, aged appearance of these shingles helps to create a more believable and immersive environment, which is crucial for any model railroader striving for realism. Whether you’re modeling a historic town, a rural farmhouse, or an old industrial site, weathered gray split shakes are the perfect addition to convey the passage of time and the durability of the structures in your design.
Benefits of Using Weathered Gray Split Shakes in Model Construction
Enhanced Realism
One of the most significant advantages of using weathered gray split shakes in your model construction is the heightened level of realism they bring to your HO-scale layout. These meticulously designed shingles offer intricate details that replicate the natural aging process of wood, adding a subtle yet impactful touch of authenticity to your model scenes. The weathered gray tone mimics the effects of time and the elements, providing a visually compelling texture that enhances the overall look and feel of any setting. Whether you’re recreating a rustic farmhouse, an old industrial building, or a historic town, these shakes help you achieve a lifelike appearance that draws viewers into the scene.
Wide Range of Options
Weathered gray split shakes are available in a diverse array of shades and textures, offering modelers the flexibility to select the perfect match for their specific project. This variety allows for greater customization, enabling you to choose the exact tone and finish that aligns with the narrative and atmosphere you’re aiming to create. Whether you need a lighter, more sun-bleached look or a darker, more heavily weathered appearance, these shingles provide the versatility to suit any creative vision. The availability of different textures also means you can mix and match to add depth and complexity to your models, making each structure unique and visually interesting.
Long-Lasting Durability
These robust shingles ensure that your model structures not only look realistic but also remain in excellent condition for years to come. The durability of these materials means that the intricate details and weathered effects will endure, maintaining the beauty and integrity of your model layout over time. This longevity is especially important for modelers who invest significant time and effort into creating detailed scenes, as it ensures that the final product remains visually appealing and intact, even with long-term display or frequent handling.
Selecting Quality HO-Scale Weathered Gray Split Shakes
When it comes to choosing HO-scale weathered gray split shakes, it’s essential to consider various factors carefully to achieve the most authentic and visually appealing results in your model.
Material Quality
The foundation of achieving a natural and realistic look in your model lies in the quality of the materials used. Opt for weathered gray split shakes crafted from high-quality, durable materials that closely mimic the texture and appearance of real wood. These premium materials are essential for replicating the subtle variations in color and texture that characterize genuine weathered wood, providing a lifelike finish that enhances the authenticity of your HO-scale models. High-quality shakes are not only visually superior but also more resilient, ensuring that your models maintain their realistic appearance over time.
Color Gradient
One of the key features of weathered wood is the natural variation in color that occurs over time due to exposure to the elements. To replicate this effect in your HO-scale models, select shakes that offer slight differences in color. These subtle variations will create a more dynamic and realistic appearance, giving the impression of a roof that has aged naturally over the years. A well-chosen color gradient can make a significant difference in the overall look of your model, adding depth and character to your scenes.
Scale Accuracy
Accuracy in scale is critical when working with HO-scale models, as even the smallest detail can impact the overall effect. This attention to scale accuracy will prevent any loss of detail and maintain the integrity of your model’s design. Properly scaled shakes will seamlessly blend with the rest of your layout, contributing to a cohesive and believable scene.
Preparing Your Model for Applying Weathered Gray Split Shakes
Proper preparation is crucial when it comes to applying weathered gray split shakes to your HO-scale model. This preparation ensures that the shakes are applied smoothly and that the final appearance is as natural and realistic as possible. Below is a detailed guide to help you get your model ready for this process.
Setting Up a Clean and Organized Workspace
Before you begin the application process, it’s essential to create a clean and well-organized workspace. A clutter-free area helps prevent the loss of small parts, like the delicate shakes, and allows you to work efficiently. Organizing your tools and materials ahead of time will also help ensure a smoother workflow, reducing the chances of mistakes or interruptions. A well-prepared workspace is the foundation for a successful and enjoyable modeling experience, enabling you to focus fully on achieving the desired results.
Planning the Shake Layout
Careful planning of the shake layout is another vital step before application. Begin by arranging the shakes to visualize how they will appear on your model. This staggered arrangement mimics the natural installation process of wooden shingles, adding depth and texture to your model’s roof. Planning the layout in advance allows you to experiment with different patterns and configurations, ensuring that the final result is both aesthetically pleasing and true to life.
Ensuring a Smooth and Natural Application
Once your workspace is prepared and the layout is planned, you can begin applying the weathered gray split shakes. The goal is to create a seamless and natural look, where the shakes appear to have been part of the structure for years. Proper preparation and careful application will enhance the overall realism of your model, bringing your miniature world to life with detailed and lifelike features.
Techniques for Applying Weathered Gray Shakes on HO-Scale Models
Applying HO-scale weathered gray split shakes involves careful attention to detail to achieve a realistic and authentic look. Here’s a step-by-step guide to help you master the application process, ensuring your model stands out with lifelike weathering effects.
Step 1: Precision Cutting of the Shakes
Begin by cutting your wood or plastic sheets into small, shingle-sized pieces that will serve as the individual shakes. It’s important to focus on precision during this step, as uniformity in size and shape will contribute to the overall realism of your model. Use a sharp cutting tool and measure each piece carefully to maintain consistency across all shakes. Taking your time with this process will pay off in the final appearance, giving your model a polished and professional look.
Step 2: Applying the Base Coat
After cutting the shakes to size, the next step is to apply a base coat of gray paint. This base coat serves as the foundation for the weathered effect you’re aiming to achieve. Choose a shade of gray that closely resembles aged wood to set the right tone for the subsequent weathering process. Apply the paint evenly across each shake, ensuring full coverage without any streaks or blotches. Allow the base coat to dry completely before moving on to the next step, as this will provide a solid foundation for the weathering effects.
Step 3: Creating Authentic Weathering Effects
Once the base coat has dried, it’s time to add the weathering effects that will give your shakes their aged and worn appearance. Use weathering powders, washes, or a combination of both to simulate the natural wear and tear that occurs over time. Focus on areas where aging would naturally be more pronounced, such as the edges or areas exposed to the elements. Vary the intensity of the weathering effects to avoid a uniform look, as real-world aging is rarely consistent. This step is crucial for achieving the depth and character that will make your model stand out.
Step 4: Adding Final Touches and Details
The final step involves adding those small touches that enhance the realism of your weathered gray shakes. Consider using a fine brush to apply highlights or darker streaks, mimicking the subtle variations in color that occur in aged wood. These final details can make a significant difference, giving your shakes a convincingly weathered and authentic appearance. Ensure that the weathering is evenly balanced, resulting in a natural and cohesive final appearance.
Applying Adhesives and Enhancing Weathering Effects for HO-Scale Shakes
When working with HO-scale weathered gray split shakes, the choice of adhesives and the application of weathering effects are critical steps that contribute to the overall realism of your model. Here’s a guide on how to effectively use adhesives and enhance the weathering effects to ensure your model looks both authentic and visually captivating.
Using the Right Adhesives
Selecting the appropriate adhesive is essential for securing your shakes without compromising the appearance of your model. Opt for a high-quality, clear adhesive that offers strong bonding power while remaining discreet. The clarity of the adhesive is important, as it ensures that the shakes stay securely in place without leaving any visible residue that could detract from the overall look.
When applying the adhesive, it’s crucial to use it sparingly. Overapplication can lead to excess glue seeping out from under the shakes, which not only affects the aesthetic but can also damage the delicate details you’ve worked hard to create. Use a fine applicator or a small brush to apply a thin, even layer of adhesive to the back of each shake. This controlled approach will help maintain the clean, sharp lines of your model, allowing the shakes to blend seamlessly into the structure.
Enhancing Weathering Effects
To take the realism of your model to the next level, you can go beyond the natural weathering that comes with the base application by adding your own weathering effects. This can be achieved through the use of weathering powders, washes, or dry brushing techniques.
Weathering Powders: These fine powders can be applied to the surface of the shakes to create subtle variations in color and texture. They can simulate dust, grime, and the natural fading that occurs over time. Gently brush the powders onto the shakes, focusing on areas that would naturally accumulate dirt or show signs of wear.
Washes: A wash is a thin, diluted layer of paint that can be applied over the shakes to enhance the depth and highlight the crevices and details. This technique helps in creating shadows and adding dimension, making the shakes look more three-dimensional and lifelike.
Dry Brushing: This technique involves lightly brushing a small amount of paint onto the surface of the shakes, particularly on the raised areas. Dry brushing can emphasize the texture of the shakes, bringing out the grain and adding contrast to the overall appearance. This method is particularly effective for replicating the look of aged and weather-beaten wood.
Bringing It All Together
By carefully selecting and applying adhesives and enhancing the weathering effects, you can significantly improve the authenticity of your HO-scale weathered gray split shakes. The combination of a secure, clean adhesive application and thoughtfully applied weathering techniques will result in a model that not only looks realistic but also tells a story of time, exposure, and the natural aging process. Your attention to these details will make your model stand out, capturing the essence of a weathered structure in miniature form.
Expert Tips for Creating Realistic Weathering Effects
Achieving a realistic weathered look on your HO-scale model requires a combination of techniques that enhance texture and depth. Here are some detailed tips to help you master the art of weathering, ensuring your model looks convincingly aged and full of character.
Techniques for Adding Authentic Texture
To create a natural, worn texture on your model, one of the most effective methods is dry brushing. This technique involves using a minimal amount of paint to lightly brush over the surface, highlighting raised areas and mimicking the roughness that comes with age. Here’s how to execute this technique:
- Select the Right Brush: Choose a flat, stiff-bristled brush for better control over the application. A soft brush can be used for more delicate textures, but a stiffer one is ideal for creating more pronounced effects.
- Prepare the Paint: Dip your brush lightly into the paint and then remove most of it by brushing on a paper towel until only a small amount remains on the bristles. The goal is to have the brush almost dry to avoid excessive paint application.
- Apply the Paint: Gently sweep the brush across the surface of the shakes or other parts of your model. Focus on edges, corners, and any raised details where natural wear would occur. The light application of paint will create a rough, textured appearance that mimics the look of weathered materials.
- Build Gradually: Start with a light coat and gradually build up the texture. It’s better to add multiple thin layers than to apply too much paint at once, which could result in an unnatural look.
Using Weathering Powders and Washes for Depth
Weathering powders and washes are essential tools for adding depth and variation to your model’s appearance. These materials help simulate the effects of dirt, rust, and general aging, bringing your model to life with subtle details.
- Choosing the Right Powders and Washes: Select powders and washes that match the colors found in naturally weathered materials. Earth tones, rust shades, and muted grays are ideal for creating a realistic effect.
- Applying Weathering Powders: Gently brush or dab the powders onto the model using a soft brush. Focus on areas where dust or dirt would naturally accumulate, such as crevices, corners, and lower sections. The key is to apply the powders sparingly—overdoing it can make the model look overly dirty rather than naturally aged.
- Using Washes for Shadows and Depth: Washes are thin, diluted paints that flow into the recesses of your model, creating shadows and emphasizing details.Use a fine brush to apply the wash, letting it seep into the cracks and crevices. After applying, lightly wipe away excess wash from the raised areas to create contrast and highlight the texture.
- Layering Effects: For the best results, layer the powders and washes gradually. Start with a light application, then build up the intensity as needed. This method allows you to control the effect and avoid overwhelming the model’s original details.
Common Pitfalls to Avoid for Realistic Weathering
When applying weathering techniques to your HO-scale models, attention to detail is crucial. Here are some common mistakes that can detract from the realism of your model, along with tips on how to avoid them.
Avoiding Over-Weathering
One of the most frequent errors in weathering is overdoing it. While it’s tempting to add extensive wear and tear to make the model stand out, too much weathering can result in an unnatural appearance that detracts from the overall effect.
- Subtlety is Key: The most convincing weathering is often the most understated. Aim to enhance your model with gentle wear that suggests a history of exposure to the elements without overwhelming the original details.
- Layer Gradually: Apply weathering in light, gradual layers, assessing the effect as you go. This approach allows you to stop at just the right moment, avoiding the trap of over-application.
Ensuring Consistent Application
Inconsistency in your weathering technique can disrupt the sense of realism, making it obvious that the effects are artificial.
- Plan Your Approach: Before you begin, have a clear plan for how and where you will apply weathering. Consider the natural ways in which elements like sunlight, rain, and dust would affect different parts of the structure.
- Maintain Uniformity: Apply weathering effects uniformly across similar surfaces. For example, if one side of a roof shows signs of aging, the other sides should display similar wear. This consistency helps maintain the illusion of a real, weathered structure.
- Use Reference Images: Study photos of real weathered buildings to guide your application. This helps ensure that your weathering mimics the natural patterns of aging and exposure.
By being mindful of these common mistakes and applying your techniques with care, you can achieve a balanced, realistic weathering effect that enhances the authenticity of your HO-scale model.
Facts
- HO-Scale Weathered Gray Split Shakes:
These miniature shingles are designed to replicate the appearance of aged wood shingles, offering a realistic, time-worn look for model railroad layouts.
- Material Quality:
High-quality weathered gray split shakes are crafted from durable materials that mimic the texture and appearance of real wood, enhancing the authenticity of model buildings.
- Color Gradient:
Effective weathered gray shakes feature slight variations in color to simulate natural aging, which adds depth and realism to model structures.
- Scale Accuracy:
Accurate scaling of weathered shakes is crucial for maintaining the visual integrity of HO-scale models.
- Application Techniques:
- Precision Cutting: Shakes should be cut carefully to maintain uniform size and shape.
- Base Coat: A gray base coat is applied to set the tone for weathering effects.
- Weathering Effects: Techniques include weathering powders, washes, and dry brushing to replicate natural wear and tear.
- Adhesives: Clear, strong adhesives should be used sparingly to secure shakes without visible residue.
- Durability:
High-quality weathered shakes are designed to be long-lasting, maintaining their appearance over time.
- Realism in Weathering:
The application of weathering powders and washes can add depth and subtle details to the model, making it more convincing.
FAQs
Q: What are HO-scale weathered gray split shakes used for in model railroading?
A: They are used to replicate the look of aged wooden shingles on model buildings, enhancing the realism of the layout.
Q: How do I choose the right weathered gray split shakes for my model?
A: Look for shakes made from high-quality materials with accurate color gradients and scale. Ensure they match the texture and appearance of real weathered wood.
Q: What are the key steps in applying weathered gray split shakes to a model?
A: Key steps include cutting the shakes to size, applying a base coat of paint, creating weathering effects, and using the right adhesives for a clean application.
Q: How can I enhance the realism of weathered gray shakes?
A: Use weathering powders and washes to add depth and simulate natural aging. Dry brushing can also be used to highlight textures and create contrast.
Q: What common mistakes should I avoid when weathering my model?
A: Avoid over-weathering, which can make the model look unrealistic. Also, ensure consistent application of weathering effects to maintain a natural appearance.
You May Also Like This: FlixhQbz
Conclusion
Incorporating HO-scale weathered gray split shakes into your model railroad layout can significantly enhance the realism of your miniature world. These meticulously crafted shingles replicate the appearance of aged wood, adding a layer of authenticity that brings your model buildings to life. By carefully selecting high-quality shakes, applying them with precision, and utilizing effective weathering techniques, you can create a convincing, time-worn look that enriches the overall visual impact of your layout. Attention to detail and the use of appropriate materials and methods are essential for achieving a realistic and enduring model that captures the essence of weathered structures.
Read More: Hawaii Times